

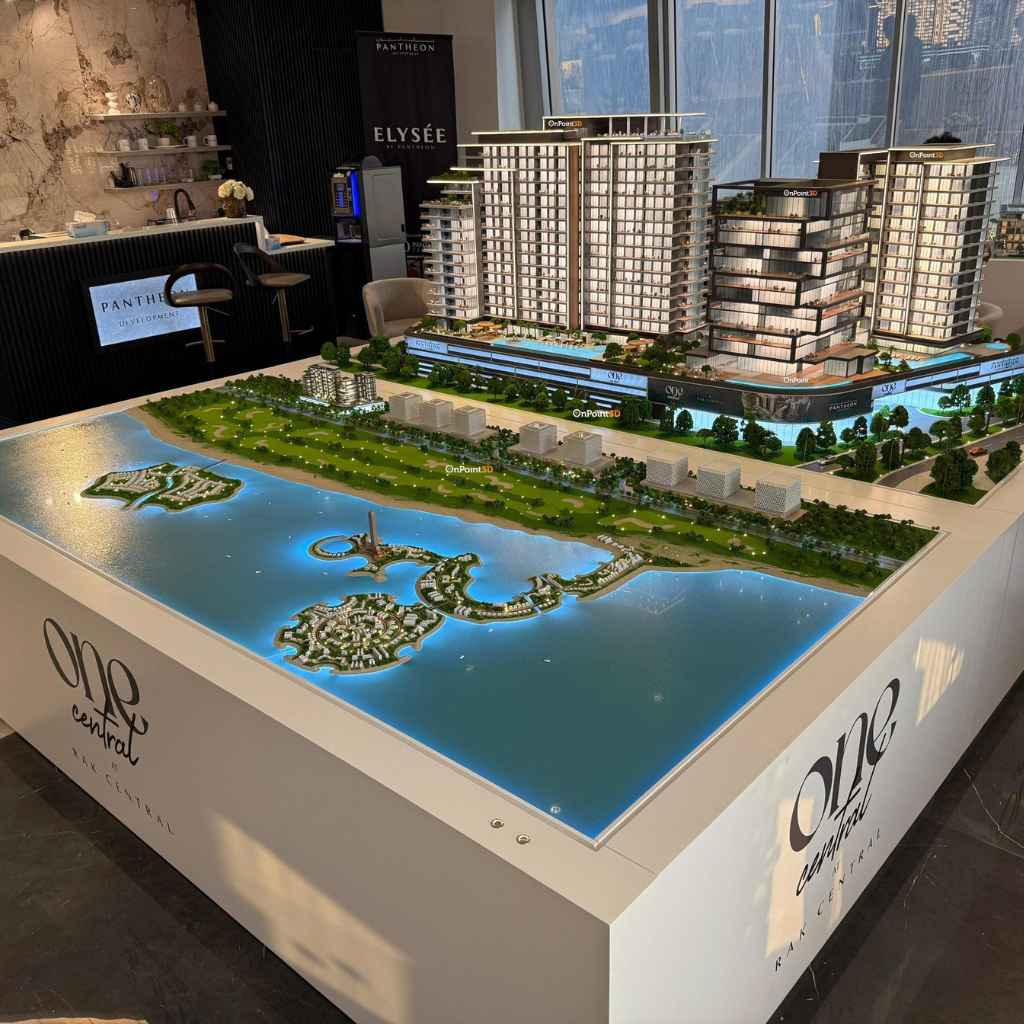
A building often begins as lines, measurements, and notes on a drawing. For people who have not worked with architectural plans, however, those details can be difficult to imagine as a finished place. A physical scale model makes the idea easier to understand by showing its form, proportions, surroundings, and relationship to nearby structures. Through model making in Dubai, developers, architects, and designers can turn technical information into a tangible presentation that communicates a project clearly. Creating that model involves more than assembling miniature parts: it requires careful interpretation, planning, fabrication, and review. Understanding each stage explains how a design moves from a blueprint to a finished physical representation.
Understanding Architectural Model Making
Architectural model making in Dubai involves the process of producing a scaled physical representation of a building, development, or designed environment. Using drawings, digital files, dimensions, and reference material, a model-making team recreates important features in three dimensions. Unlike a flat plan, a model helps viewers understand height, depth, massing, circulation, and the connection between a structure and its surroundings.
Models vary according to their purpose. A conceptual model may focus on overall shape and volume, while a presentation model can include detailed façades, windows, landscaping, roads, lighting, and neighboring buildings. These models can support design discussions, stakeholder presentations, exhibitions, and property marketing by making proposals easier to interpret.
From Architectural Drawings to a Production Plan
Before fabrication begins, the project team studies the available information and establishes what the finished model must communicate. This stage connects the architect’s design intent with the practical requirements of building a physical object. A clear workflow gives clients checkpoints to review decisions before the finished model is ready for public display. The team considers scale, level of detail, display space, materials, deadlines, and how the model will be transported or installed.
- Reviewing Drawings and Reference Files
Plans, elevations, sections, digital models, dimensions, and reference images are checked together. If information is missing or inconsistent, clarification helps prevent errors from carrying through to production.
- Defining the Scale
The chosen scale determines how much detail can be shown and how large the finished model will be. It must balance readability with the space available for display, while keeping the proportions of the original design consistent.
- Selecting Suitable Materials
Materials are chosen according to the required finish, strength, texture, and fabrication method. Different components may need different materials to represent glass, concrete, metal, paving, or planted areas convincingly.
- Breaking the Design into Components
Large structures are divided into manageable parts, such as building volumes, façades, roof sections, roads, and landscape elements. This makes complex forms easier to produce, align, and assemble.
- Planning Fabrication Methods
The team decides which parts are best made through cutting, handcrafting, 3D printing, or a combination of techniques. The choice depends on geometry, precision, quantity, and the desired surface finish.
- Confirming Presentation Requirements
The base, viewing angles, lighting, access points, and any interactive features are planned before production. These decisions help ensure that the model serves its intended purpose once it is displayed.
Preparing Digital Geometry for Accurate Production
Once the plan is agreed, digital preparation translates the design into geometry that can be fabricated at the chosen scale. Designers organize surfaces and components, check dimensions, and adjust details that may be too small or delicate to reproduce physically. For 3D printing, files may need checks for wall thickness, orientation, unsupported sections, and overall geometry. A digital review also helps identify clashes, missing elements, and alignment issues before materials and production time are committed. This stage connects architectural information with the practical limits of the selected manufacturing process.
Fabricating and Assembling the Physical Model
Production turns the approved design into tangible components. Depending on the project, pieces may be cut from sheet materials, printed, shaped by hand, or made using several methods together. The main building forms are generally assembled first so that proportions and alignment can be checked before smaller details are attached.
Façades, balconies, windows, roof features, roads, pathways, and landscaping are then added according to the approved design. Finishing helps distinguish surfaces and materials, while accurate placement keeps the model consistent with the drawings. For a large development, the position of each building and shared site feature must also be checked against the overall layout.
Five important production checks help keep the work on track:
- Dimensional accuracy
- Consistent scale and proportions
- Secure component assembly
- Clean surfaces and finishes
- Correct placement of site features
- Alignment with approved drawings
Regular checks make it easier to catch issues before the model is complete. They also help the team maintain visual consistency across individual components and the finished display.
A final review checks that buildings are aligned, finishes are clean, details are secure, and site features match the approved layout. Lighting and interactive elements, when included, should be tested before handover. Packaging, transportation, and installation also need planning, especially for large or delicate models. These steps protect the finished work and prepare it for a sales gallery, office, exhibition, or project presentation.
Choosing a Suitable Model-Making Partner
Selecting a provider involves more than looking at attractive photographs. Clients should assess whether the team understands the drawings, can manage the project’s complexity, and has the production methods needed for the intended result. It is useful to review comparable work, clarify how revisions are handled, and agree on delivery expectations before production starts. Clear communication and a shared understanding of the brief can reduce confusion and help the finished model meet its purpose.
Conclusion
Turning blueprints into a physical model is a step-by-step process that brings together design interpretation, planning, digital preparation, fabrication, assembly, and quality review. Each stage contributes to a model that communicates a project’s form and details.
For clients searching for an architectural model maker near me, On Point 3D offers architectural model making alongside 3D visualization and fabrication services. Its combination of design understanding and production capabilities helps developers, architects, and businesses present concepts through detailed physical models and visual experiences. By translating plans into tangible representations, On Point 3D supports clearer project communication and more engaging presentations.
